I've been experimenting with the new Nature's Sweetness suite from the soon-to-be-available January-April 2024 Mini-Catalogue.
It's been a pleasure to play around with, not only because it's just a beautiful suite, but also because it's the focus for the Creativity Abounds Virtual Stamp Camp in February. I've made a few lovely samples with it, ready to put into the tutorial bundle and for my Facebook Live project during Stamp Camp itself.
So I'm sharing this one with you today as a bit of a teaser. It's a great technique for using up scraps and works well with any bits of paper you've got in the scrap bin.
I hope you enjoy the tutorial. Feel free to contact me if you have any questions, or if you'd like some more information about the upcoming Stamp Camp.
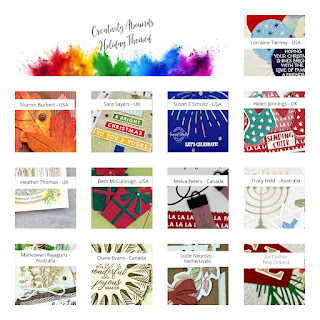
Welcome to the latest hop with the Creativity Abounds team! We're a group of demonstrators from around the world who come together to share ideas and inspiration with you.
On the third Wednesday of the month (or Thursday if you are in the South Pacific), we hop to share some inspiration with you on a particular theme or set. This month, we're featuring Birthdays.
I've created one project to share with you today - and a second one as part of the Creativity AboundsTutorial Bundle for December. This 13 tutorial bundle is free from me with a qualifying purchase of $90 or more. If you live somewhere other than New Zealand and purchase from a team member there, you'll receive the tutorial bundle from them.
One of my favourite sets is Artistically Inked, especially when paired up with the coordinating Chic dies. I love the useful sentiments and pretty images. You'll see from my two projects that it offers an array of different looks too. The project I'm sharing with you today has a very vintage look, while you'll see from the sneak peek below that my tutorial bundle project is bright and clean.
For this card you will need:
Blackberry Bliss 21cm x 14.8cm, scored at 10.5cm (8 1/2" x 5 1/4", scored at 4 1/4")
Moody Mauve 10cm x 14.3cm (4" x 5 1/4")
Very Vanilla for card front 9.5cm x13.8cm (3 3/4" x 5")
Very Vanilla for sentiment 10cm x 2.5cm
Very Vanilla for stamping
Old Olive
Vellum
Moody Mauve for inside 10cm x 14.3cm (4" x 5 1/4")
Very Vanilla for inside 9.5 x 13.8cm (3 3/4" x 5")
Fold and burnish the Blackberry Bliss along the score line.
Adhere one of the pieces of Moody Mauve to the card front at an angle so that all four points touch the edge of the card base (or as near as possible).
Take the large leaf die from the Artistic dies and cut one from the Old Olive. Set aside.
Cut a 9cm circle (3 1/2" circle) from the vellum. Emboss with the Timeworn Type embossing folder (or one of your choice). Set aside.
Stamp one large flower blob in Blackberry Bliss on the Very Vanilla. Stamp 2 of the larger roses in Moody Mauve. Die cut and set aside.
Stamp the 'Happy Birthday' in Blackberry Bliss on the sentiment Very Vanilla. Die cut with label from Labels Aglow (or of your choice) and set aside.
You are now ready to create the background pattern for the card front. Take the piece of Very Vanilla for the card front.
Using the large ink blot stamp, stamp randomly all over the card front in Crumb Cake ink.
Take the rose shaped flower and stamp 3 or 4 times randomly over the card front in Blackberry Bliss. Don't stamp them too close together as you need room for the leaves.
Take the double leaf stamp and using Old Olive ink, stamp in some leaves. Make sure some of them go off the edge of the page.
Add in some of the small rose shaped stamp in Moody Mauve to fill gaps and add colour to the edges.
Take a blending brush and add a light wash of Crumb Cake around the edge to give a vignette effect
Adhere this panel to the card front taking care to keep it square with the edges of the card.
Adhere the embossed vellum circle to the lower left side of the card front.
Arrange the three stamped flowers, with the largest Blackberry Bliss one on partly on top of,and between, the two Moody Mauve flowers. When you are satisfied with their placement, attach with dimensionals. The large flower, as it overlaps the two smaller ones, will not need as many dimensionals as the overlap can be adhered with tape or glue instead. It may need support in the gap between flowers however, depending on how you've arranged them.
Take the die cut spray of leaves and cut them into pairs and singles. Tuck them in around the flowers. You can attach them with glue, tape or glue dots. If there is a dimensional in the way, you can cut the unseen part of the leaf off to let it fit in.
Adhere the sentiment to the cluster. It will be glued in the centre where it is over the raised flowers. It might need a dimensional at the ends if there is a big overhang.
Add three Iridescent Rhinestone Jewels (or other embellishments of choice)
Stamp the inside white piece as desired, mat to the second piece of Moody Mauve and adhere to the inside of the card.
If the written instructions are not your thing, then you're welcome to watch the video tutorial instead.
Here's a sneak peek of the project I've made to be part of the Creativity Abounds December Tutorial package.
Remember, it's available from me free with any purchase of $90 or more. If you don't live in New Zealand and can't purchase from me, you will receive the package if you purchase from a team member who is operating in your country. I'm happy to put you in touch with them.
Here's a sneak peek of the whole tutorial package
Head's Up on our February Stamp Camp
In February next year, Creativity Abounds will be running another of our popular On Line Stamp Camps. It will feature the Nature's Sweetness suite from the January-April Mini Catalogue. Access to the camp -and the TWENTY SIX projects and tutorial videos - is ONLY by purchase of the suite from one of our members. Please message if you'd like more information.
If you are a demonstrator, and you wish to join us but have already purchased the suite then you can make an order of similar value from us, let us know, and you will still receive the invitation. Please message me if you want further information,
It was a hot summery day and I retreated to my cool craft room to indulge in playing with some of my pre-order items from the January 2024 Mini Catalogue. First up was the Notes of Nature bundle, part of the Nature's Sweetness suite.
I like the eclectic mix of images in this set, beautifully enhanced by the add-on die cuts. I enjoyed creating the stamped background for the foliage and sentiment cluster, using a mix of Pebbled Path and Granny Apple Green ink.
The cork embellishments are part of the Nature's Sweetness suite, as is the lovely Specialty DSP.
These products will be available in the New Year. As always, the release of the Mini Catalogue is also the beginning of the Sale-abration promotion.
If you live in New Zealand and don't have a Stampin' Up Demonstrator, I'd love to be yours. I can help you with ideas, get you catalogues and provide you with Stampin' Up products. You can leave a message in the comments or contact me using any of the methods listed in the Contact Me tab at the top of the page. If you would like a copy of the catalogue, please message me.
You can shop with me from anywhere in New Zealand by clicking here.
Welcome to a new hop with the crew at Around the World on Wednesday. On the second Wednesday of each month, the team put together a thematic hop to give you some inspiration for your own crafting. We love it when you try out something new or CAS(E) one of our projects. The team is truly international, with members from each time zone of the world that Stampin' Up! operates. You're with me, in New Zealand - the first place in the Stampin' Up! world to change the date. 😀
This month, we have a technique to share with you. We're all playing around with INK SMOOSHING. I was delighted by this choice as it's one of my favourite techniques. If you've never done it before, or would like a refresher, then watch the video tutorial below. It's such a fun technique and it's one of those ones where you're never quite sure what you're going to get. 😀
I started out by ink smooshing a piece of Fluid100 Water Colour paper then die cutting my snowflakes from it. I love the way that this technique creates such a lovely flow and blend of colours.
The background is embossed with the Distressed Tile 3D embossing folder and I've used silver FestivePearls to embellish my snowflake wreath.
You can see how I put it all together here.
The next stop on the hop is the fabulous Leonie Stuart from Australia.
If you live in New Zealand and don't have a Stampin' Up Demonstrator, I'd love to be yours. I can help you with ideas, get you catalogues and provide you with Stampin' Up products. You can leave a message in the comments or contact me using any of the methods listed in the Contact Me tab at the top of the page.
You can shop with me from anywhere in New Zealand by clicking here.
You can earn free gifts with your orders:
Any order of $90 will receive the Creativity Abounds Tutorial Bundle, with 13 projects. This month the theme is gift packaging or decoration.
And if you purchase the Joy of Noel bundle, you'll also receive a project bundle from 'Join in with Joanne and Jan' which will give you two project tutorials from me and two from my buddy Joanne James, aka The Crafty Owl.
If you get lost around the hop, here's a list of participants to help you find your way.
We don't blog hop as such but the team at Stampin' Fancy Friday do a daily inspiration post on Instagram. The team at Stampin' Fancy Friday are all current or past members of Stampin' Up!'s Artisan Design Team, so it really is a great place to pick up ideas or recharge your creative mojo. Follow @stampinfancyfriday if you don't already. 😀
The thing about DSP is, that not only is it striking in its own right, but you can do with it what ever you can do with ordinary plain card.
So in this card, the only thing that isn't DSP is the card base, a vellum circle and the Silver AdhesiveBacked Glimmer Paper.
I started by die cutting out a series of circles from Winter Meadow DSP using a small Deckled Circle die. These were adhered to a piece of Basic White card then the whole thing embossed with the Distressed Tile 3D embossing folder. I lightly sponged the edge in Blueberry Bushel.
The foliage die cuts, from the Magical Meadow set were cut from Winter Meadow DSP and the SnowflakeMagic Specialty DSP (with some Glimmer Paper berries).
Even the sentiment is embossed onto a piece of DSP.
f you live in New Zealand and don't have a Stampin' Up Demonstrator, I'd love to be yours. I can help you with ideas, get you catalogues and provide you with Stampin' Up products. You can leave a message in the comments or contact me using any of the methods listed in the Contact Me tab at the top of the page.
You can shop with me from anywhere in New Zealand by clicking here.
Orders placed with me can earn free tutorials.
Any order of $90 or more will receive the Creativity Abounds Tutorial Bundle, with 13 projects, as a thank you gift.
And if you purchase the Joy of Noel bundle, you'll also receive a project bundle from 'Join in with Joanne and Jan' which will give you two project tutorials from me and two from my buddy Joanne James, aka The Crafty Owl.
Although it's technically the start of summer this week, the weather is not cooperating. It's wet and cold, so I'm in my craft room preparing for the end-of-year class party for my card makers. Somehow, I got distracted by the sketch at Freshly Made Sketches.... don't know how that could possibly have happened! 😁
From the moment I saw the sketch, I saw a solar system of planets and stars. No matter how much I tried to make it be flowers, those planets just wouldn't budge. So I gave up and went with the flow - and I'm really glad that I did.
I ink smooshed a piece of Fluid 100 Water Color paper with Bubble Bath, Fresh Freesia and Coastal Cabana. When it was dry I cut some planets using the Reach for the Stars dies.
I stamped the astronaut in Smoky Slate and coloured her in with Fresh Freesia and Bubble Bath Stampin' Blends, along with some touches from the Coastal Cabana Stampin' Write marker. Even an astronaut needs her bling right, so her faceplate, gloves and boots have a coating of Wink of Stella.
Before I adding the planets, I added in a swoosh of ink splatters in Fresh Freesia and embossed the card front with one of the embossing folders from the Basics 3D embossing folders (Online Exclusive product).
The sentiment was cut using one of the dies from Something Fancy and has a shadow cut from some of the Adhesive Backed Silver Glimmer paper (also an Online Exclusive product).
A few Basic Rhinestone jewels and hey presto, our Glitter Girl Astronaut is done and dusted!
Update: Delighted to be chosen as a Perfect Princess at Freshly Made Sketches!
If you live in New Zealand and don't have a Stampin' Up Demonstrator, I'd love to be yours. I can help you with ideas, get you catalogues and provide you with Stampin' Up products. You can leave a message in the comments or contact me using any of the methods listed in the Contact Me tab at the top of the page.
You can shop with me from anywhere in New Zealand by clicking here.
Free Gifts with Orders
Any order of $90 will receive the Creativity Abounds Tutorial Bundle, with 13 projects based around the September - December Mini Catalogue, as a thank you gift.
And if you purchase the Joy of Noel bundle, you'll also receive a project bundle from 'Join in with Joanne and Jan' which will give you two project tutorials from me and two from my buddy Joanne James, aka The Crafty Owl.


")


")


 Adhesive Backed Glimmer Paper")


