Friday, 16 December 2016

Hand Stamped Sentiments 253

To me, the colour challenge at Hand Stamped Sentiments was irresistible! I love those rich colours and it fell right into my hands as I as experimenting with the newly arrived Dragonfly Dreams (available in the new Occasions catalogue in January).


The background of the centre panel is acrylic block stamped. I stamped on the dots in Eggplant and Pear but then wet the Eggplant ones so they bled a little. The card base is embossed using the Softly Falling folder to echo the dots in the panel.


The dragonfly die cut is so beautiful that after a lick of Wink of Stella and some enamel dots, little else was needed.


Here the embossed card base and the Wink of Stella are easier to see.


Update: So delighted to be an Artist's Pick at Hand Stamped Sentiments.

Ingredients
Card: Elegant Eggplant, Pear Pizzazz, Watercolour paper, Whisper White
Stamps: Dragonfly Dreams
Inks: Elegant Eggplant, Bermuda Bay, Pear Pizzazz, Tuxedo Black
Other: Softly Falling embossing folder, Detailed Dragonfly thinlits, Bermuda Bay enamel shapes, Bermuda Bay thick baker's twine, clear Wink of Stella, dimensionals


Thursday, 15 December 2016

Global Design Project 66

It's funny how you can start with one clear idea and end up in some other place. That's what happened with this card.

New stuff arrived earlier in the week. As I was playing with Dragonfly Dreams, the set I was most desperate to have, a great idea for a card based on the sketch at Global Design Project came to me.


I could see what was required: a background in the top leftish area, a vertical and a tag for the greeting. All was clear in my head. But. But as I went to attach the tag to the twine I just couldn't do it. It seemed so wrong! 

So, a dilemma. Had I changed it too much or was this acceptable modification? The card was definitely inspired by the sketch although not ruled by it. I decided to share anyway, especially after I had a good look at the Design Team offerings and saw that some of them did away with the tag too.


I cut two of the flight of dragonflies, one in Early Espresso and one in Pear Pizzazz. I set the Espresso dragonflies into the outline on the Pear, backed it with Crumb Cake and inlaid the little green bits separating the dragonflies. Then I gave the Crumb Cake a lick of clear Wink of Stella, which you can see in the close-up.


I added in some raindrop splatters to ground the flight of dragonflies.


And a peek inside, showing the other half of the sentiment stamp.


This adorable set, and the co-ordinating dies, will be available in the new Occasions catalogue in the New Year.

Ingredients
Card: Early Espresso, Pear Pizzazz, Crumb Cake.
Stamps: Dragonfly Dreams, Timeless Textures
Inks: Pear Pizzazz, Early Espresso
Other: Detailed Dragonfly thinlits, Linen twine, clear Wink of Stella.


Tuesday, 13 December 2016

The Paper Players 325

The final Paper Players challenge of the year was harder than it seemed at first glance. It looked so Christmassy and so opulent but it was so hard to get the metallics balanced!


The whole idea started off with a piece of embossed vellum I've had sitting on my desk for a while, ever since I embossed it just to see what would happen.


The gold wreath ring is cut using two scallop circles from the layering die set. The stars are cut using star elements from a couple of other thinlet sets: the Circle flip card and the Mini Treat Bags and using a mix of gold and silver foil and silver glimmer paper.


I've added in a few stars and circles from Metallic Shapes.


I also did something I seldom do - I saved the sentiment for the inside.


Update: Delighted to be picked as A Cut Above at the Paper Players!

Ingredients
Card: Whisper White, Silver Foil, Vellum, Scraps of Gold foil and Silver Glimmer paper.
Stamps: Peace This Christmas
Ink: Versamark
Other: Holly embossing folder, Gold embossing powder, Layering Circle framelits, Star dies from Mini Treat thinlits and Circle Flip card thinlit, Gold cord, Silver metallic shapes, dimensional.


Sunday, 11 December 2016

SIP 77

I was feeling well over making Christmas cards, so it was very exciting that the courier arrived yesterday afternoon with my box of Stampin' Up pre-order: it was a long wait from pre-order day!

It was doubly exciting because this is one of the few times I've ever had a pre-order and I'm really pleased that I could use something for the challenge at Stamp, Ink, Paper because I just love this sketch.


I'm glad the Lift Me Up set, which will be available after 4 January, is rubber rather than photopolymer as I find it so much easier to multi-colour a rubber stamp. And those gorgeous balloons were just begging to be coloured!


The small balloon I coloured, stamped then masked off. Then I placed the large circle mask, sponged it over with Soft Sky then used a scallop-edge circle to sponge on Marina Mist to create the cloud effect. The big balloon is popped up on dimensionals.


I've showed you the inside so you can see the other half of the birthday sentiment. I masked the stamp so it could be stamped in two halves.


So, I'm very happy with this masculine (but not exclusively masculine) card and am keen now to get back to my room and explore that big, brown Stampin' Up box some more!

Update: So delighted to be a Top Pick at Stamp, Ink, Paper!
Ingredients
Card: Night of Navy, Whisper White, Carried Away DSP (available in Sale-a-bration)
Stamps: Lift Me Up
Inks: Night of Navy, Soft Sky, Marina Mist
Other: Up & Away thinlits,  Stamp'n'Write markers: Night of Navy, Watermelon Wonder, Mint Macaron, Peekaboo Peach, sponges, dimensionals, scallop circle punch, circle framelits


Saturday, 10 December 2016

Case this Sketch 201

I thought I was over making Christmas cards but the sketch at Cas(e) This Sketch this week gave me a chance to try out an idea I've been thinking on for a few days. I've been thinking about using non-Christmas stamps for Christmas cards, like this beautiful peony from Altenew's Peony Bouquet set.

Here is Cas(e) This Sketch's inspiration:


And here is my non-Christmas stamp Christmas card. The main image might not be a Christmas stamp but you can't get a much more traditional colourway than Cherry Cobbler and Gold.


It was also my first play with using Shimmery White cardstock to watercolour on. It does have a lovely shimmer in the paper too, that worked well wiht the gold embossing.


Lots of masking happened also in this card. The flower was masked to add the leaves and both were masked out the add the starry background. 

I'd certainly be happy to be sent this card, so I hope the eventual recipient will too!

Ingredients
Card: Cherry Cobbler, Gold foil, Shimmery white cardstock
Stamps: Altenew Peony Bouquet, Stampin' Up Holly Jolly Greetings and Holly Berry Happiness
Inks: Cherry Cobbler, Garden Green, Versamark, Gold
Other: Gold embossing powder, post-it notes, water and paintbrush.


Sunday, 4 December 2016

FMS 265

The weekend is almost at an end. It's been busy and social, as this time of the year often is, but I found a quiet moment to pop into my craft room to have a play with the sketch at Freshly Made Sketches.


Today's card is an experiment with bling. I don't usually go in for very much sparkle and shine but it's happened on a Christmas card or two of late. This card uses several subtle bling elements which I wanted to contrast with the natural scene. Two of those elements are the scallop-edged halo of silver glimmer paper that just gives a hint of sparkle. Another is the silver embossed 'birthday'.


Another is the use of rhinestones down the centre of the butterfly. The butterfly has been inked and blended and some highlights added with white gel pen, before getting a layer of clear Wink of Stella.


This close-up shows the Wink of Stella on the wings. It also captures the final bling element: there are a number of fern fronds heat embossed in Iridescent Ice powder. They show up as sparkle but in places there is also a resist emboss effect in the sponged background.


In real life, the effect of the sparkle and shine elements is subtle, yet collectively appealing. So I will call this experiment a success!

Ingredients
Card: Soft Sky, Silver Glimmer, Whisper White, Calypso Coral, Watercolour paper
Stamps: Papillon Potpourri, Butterfly Basics, Number of Years
Inks: So Saffron, Calypso Coral, Old Olive, Black Stazon, Soft Sky, Versamark
Other: Number of Years banner die, Elegant Butterfly punch, Iridescent Ice embossing powder, silver embossing powder, white gel pen, rhinestones, clear Wink of Stella, dimensionals, layering circle framelits, blender pen, sponges


Friday, 2 December 2016

Paper Player 323 Inkspire Me 278

I've had my eye on the appealing sketch at The Paper Players all week. During the day, I had an idea for the sketch, so with work over and the weekend just beginning, I got into my craft room to see if I could make it happen.


To make the sky, I put some peel-off stars on before I sponged the sky. Then I stamped the stars from Holly Jolly Greetings in silver before removing the stickers. I was tempted to leave the little silver stars on but they detracted too much from the star on the tree. The Lucky Stars embossing folder, used on the card front, continues the starry night theme.


The 'Merry Christmas' is cut down from Simon Says Stamp Holiday Frames die. I backed the Christmas so that I could put back in the bits of the R and A to make them whole rather than outlines only.

I'm pretty happy with how it's turned out.

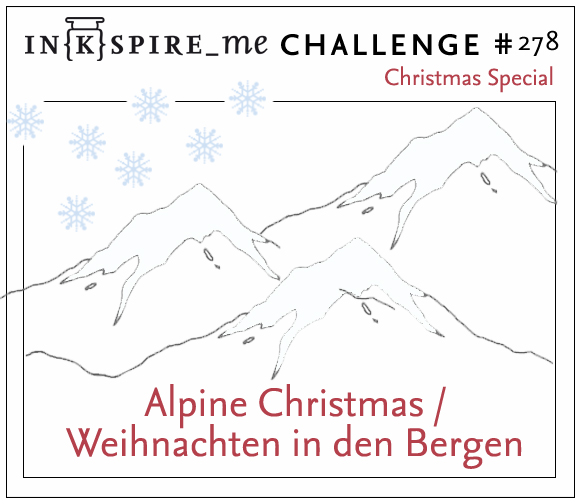
I'm also entering this card into the Alpine Christmas Challenge at Inkspire Me because I saw it this morning before work and it got me thinking about snowy scenes.


Ingredients
Card: Rich Razzleberry, Whisper White, Silver glimmer paper
Stamps: Totally Trees
Ink: Rich Razzleberry, Night of Navy, Island Indigo
Other: Simon Says Stamp Holiday Frames die, Peel-off stars, sponges, Lucky Stars embossing folder, Silver metallic star shape.