Isn't the year going quickly? It's already time for another monthly hop with the 2020 Artisan Design Team. This month, it's our pleasure to be sharing with you creations made using the Snowflake Splendour suite. This suite has beautiful stamps with coordinating dies, an embossing folder, delicious DSP along with some Balmy Blue Glimmer paper, holographic ribbon and the most spectacular blue adhesive-backed embellishments. Here's a glimpse of the whole suite. Did you know that if you want to purchase an entire suite, you can use a single product code rather than having to enter each item separately? The product code for this suite collection is 155115.

Since Christmas is mid-summer in New Zealand, we don't see much snow. Even so, many of us still buy into the mythos of 'a White Christmas' experience, even if we don't have it ourselves. In the case of a suite as wonderful as this, sometimes you just want to embrace the beauty and creative possibilities no matter what the actual Christmas Day weather forecast is likely to be. That's certainly what happened to me - I put the swimming pool out of my mind and just enjoyed the beauty of this suite. And a beauty it is.
Here are my three projects - two cards and a Christmas tree ornament. I'll share more information about each one.
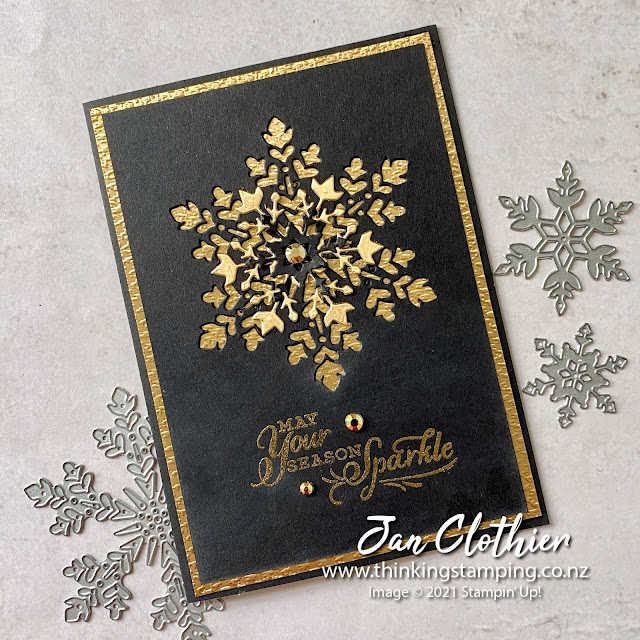
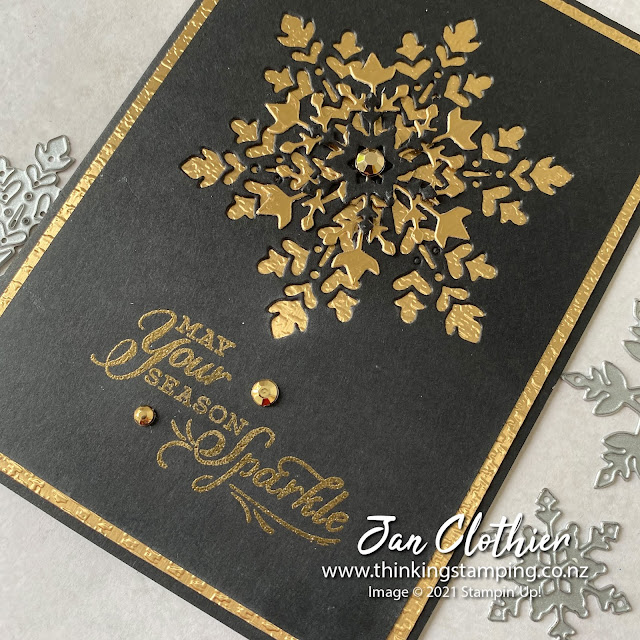
1. Christmas Card with semi-embossed sentiment
This is a straight-forward card to make and you could choose any of the patterns of DSP for this and match the card base accordingly.
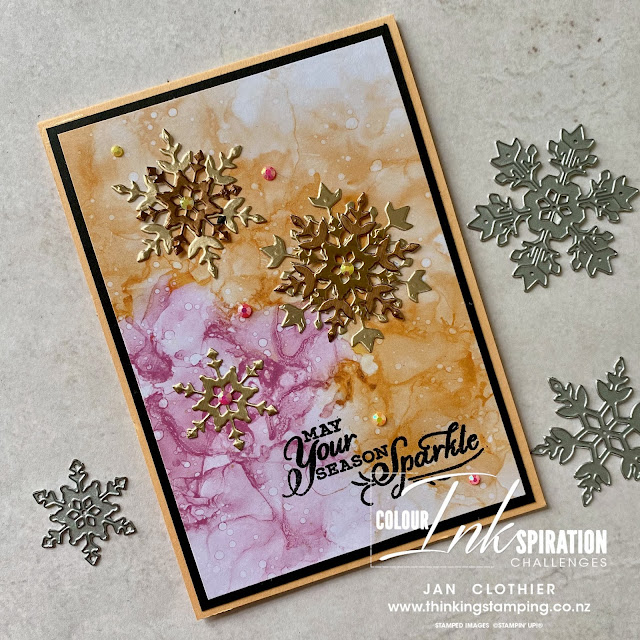
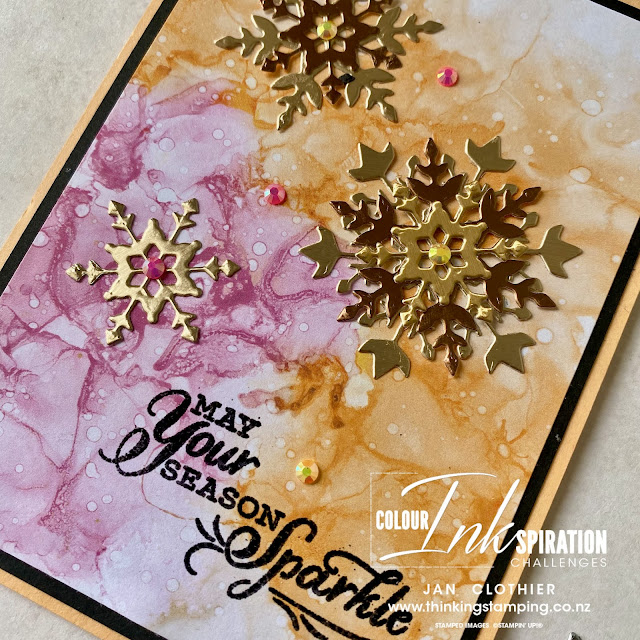
I've used Highland Heather as the base and attached a full card front of DSP to it. I cut a piece of Whisper White narrower than the card front and randomly cut the negative space snowflake die three times before embossing it with the Subtle embossing folder. After attaching this piece to the card front, I cut one medium and two small snowflakes from the Balmy Blue Glimmer paper and attached those too.
I stamped the sentiment in Highland Heather ink, using the Stamparatus. In order to semi-emboss the sentiment, I applied Versamark to the lower half of the sentiment using a dry Water Painter then re-stamped and added Silver embossing powder. Then I cut it out using the
Sweetly Stitched dies. The swoosh of beautiful holographic white ribbon tucked in behind reinforces the sparkle.
Finally, I've added some of those opulent Blue Adhesive-backed Gems to the centre of the Balmy Blue Glimmer Paper snowflakes and around the sentiment.
2. Square Wreath Card
This card is more fiddly to make but I think it's worth the effort.
I started by taking a piece of Shimmery White card and ink-smooshing it using a mix of Highland Heather and Balmy Blue inks. I put some of both inks on a large acrylic block, spritzed it with water until the ink started to run, then smooshed it onto the paper. I couldn't wait patiently for it to dry so hit it with the heat gun to speed the process up.
Then I cut out a pile of the smallest snowflake, making sure to get a range of colours. In the end I used eleven but I've made others that used one or two more (or less). It depends how you place them how many you'll need.
The card front is 10.5cm x 10.5cm and is cut from Balmy Blue. The Whisper White 10cm x 10 cm front is embossed using the Winter Snow embossing folder. I've cut a hollow circle using the
Layering Circle dies in Whisper White and used it as a base for the wreath - you can see it in the photo if you're looking for it. This helps give the wreath a good shape.
I added in a Blue Adhesive-backed Gem in the centre of each snowflake. The sentiment, which is silver embossed on Balmy Blue, is taken from a larger sentiment in the set 'Snowflake Wishes for a Merry Christmas'.
3. Christmas Tree Ornament
I've made these decorations many times over the years but these ones are my favourites. They're really easy to make, although it helps if you have a hot-glue gun. :-)
These ones are made using two strips of DSP, 30 cm x 5 cm and scored at 1 cm intervals. Once scored, the two pieces are first into one long strip and then the two ends joined together.
Then you need two small circles of plain card - I used Balmy Blue. Push the scored DSP flat so it makes a circle and use hot glue (or strong adhesive) to attach it to one of the plain circles of card. Make sure you centre the plain card circle over the scored DSP circle. Then attach the second circle to the other side similarly.
Then all you have to do is decorate the centre as you like. I've used a large and small Balmy Blue Glimmer Paper snowflake layered with a medium sized Balmy Blue snow flake and finished with a Blue Adhesive-backed Gem.
Attach a loop of ribbon to the back to hang it on the tree. They look nice in a variety of sizes, so don't be afraid to experiment. Once you've made one, they're very easy - and quite addictive - to do.
The rest of the Artisan Design Team have beautiful creations to share with you, so why not carry on around the hop? Next up is the fabulous Lauren Alarid.
If you live in New Zealand and don't have a Stampin' Up! Demonstrator, I'd love to be yours. I can help you with ideas, get you catalogues and provide you with Stampin' Up products. You can leave a message in the comments or contact me using any of the methods listed in the Contact Me tab at the top of the page. You can shop with me from anywhere in New Zealand by clicking on the SHOP NOW button in the sidebar or clicking on any of products below.
Product List

")


 Specialty Designer Series Paper")


")


 Ribbon")


